.png)
Marble Panels
- Jun 28, 2022
- 4 min read
The inspiration for these marble panels all started with an image from The MuseumsQuartier in Vienna with its bright swirling colors bordered by beautiful white columns. How stunning!!! I thought about my very talented friend Mercedez Rex who's an artist that works with marble dye. She has created some absolutely gorgeous patterns and I asked her if she was interested in collaborating on a project together. Of course she was just as excited about it as I was!


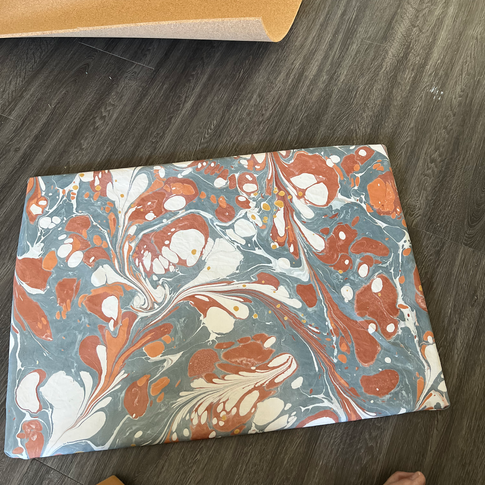
I first loved the idea of going bright with color but the aesthetic of my house is overall a bit more muted. So I worked with Mercedez to create a custom color palette to bring in some earth tones. Over time I narrowed in on a few colors that really stood out to me; mostly terracotta and blue. We did a bunch of tests until we got the pattern/palette that we wanted and the fabric that would work best. We settled on a Pimatex Cotton from Dharma Trading that took the color well and also had a good weight to it.


Now that we had the fabric settled, I had to focus on how this project was going to be executed! First, I made a rendering in SketchUp with the dimensions of the room to determine what size the panels would be. The height of wainscoting is typically 1/3 of the room so I started with that as my guide. Then since a wood plank is generally 3-4", I did some math to figure out what the width of each fabric panel would be - if I went with 4 vs 3 on that wall or 2 on that wall, etc. At this point, it's trial and error to see it all together before you decide on the amount of panels. If it looked like too many, I went down in number. I also decided that I wanted to have wood stained trim to surround the boards vs a paint-grade moulding. I love the look and feel of wood and I wanted something that brought a rustic element to offset the pattern. My carpenter ended up finding some longleaf pine from a 1910 homestead in Stanton, Alabama which has beautiful grain and color to it.


I then went to my carpenter and told him what I wanted to do. He decided that creating a rabbet in the wood boards would allow the fabric panels to sit flush inside. And to create the fabric panels we would take a piece of plywood, attach 1/4" cork board to it to add some thickness and cushion, then wrap the fabric panels around them and staple it down. Once we knew the exact measurements of each wood piece, I was able to determine the size of each fabric panel to get the plywood cut down. After months of concept development, research and planning - we finally got it installed! I was so happy with the results!!


Now if you asked me if I designed the whole room before moving forward with this project, the answer is NO! lol. I wanted to get a feel for the space with the panels installed before I thought about designing the rest. This room is set to be our sitting/reading room and my husband and I decided that we wanted to go full on with pattern in here. Patterned drapery and chairs, etc. To master this right is going to take more time and planning but I'm up for the challenge! Follow along to see how this room develops. And for step-by-step instructions of how the fabric panels were made, see below :)
HOW TO MAKE FABRIC PANELS
Materials needed: plywood, 1/4" cork board, staple gun, X-Acto knife, fabric (+ carpenter)


After the plywood has been cut to their correct sizes, you'll lay each piece on top of the cork board and cut out each piece exactly to size.
Then, you'll use your staple gun and staple around the edges (and in the middle if you feel like you want the middle more supported.)
Next, you'll lie your plywood/cork pieces on top of the fabric with the cork board against the back of the fabric. You'll stretch the sides around and staple them down tight. Go all the way around and be careful with your corners.
In this video, I talk about how the panels fit with the wood moulding. My carpenter created a 'rabbet' where the panels sit perfectly into and create a finished look.
Don't forget to cut out for the outlets!! My carpenter cut the plywood/cork out first - then I attached the fabric. From the bottom side, I cut out a strip in the middle and cut angles towards the corners and stapled these down on the front side so that it was extra tight. The outlet cover will cover any sign of this.
Here is a video mid-installation of our carpenters installing the wood trim. They started with the bottom horizontal piece, then did each vertical piece, finishing it off with the top horizontal piece. They also stained these on site with a natural finish.
And voila! They are done!


Comments